Pages

Wednesday, August 17, 2011

I-Scream, You-Scream, We all Scream for Ice-Cream...

8th Birthday Cupcakes: 17-Aug-2011

I could not resist making these for my oldest birthday - for him to share with his fellow classmates! What a ball they must have had... and of course, I just HAD to share some pictures... & here they are... Yum Yum Yum!! It sure smelt GREAT as I was carrying them to his classroom!!


So what did I do to produce these cute cupcakes, I hear you ask... 

Well, I used my favourite chocolate cupcake recipe (any cupcake/cake recipe will work really...) & filled each cone 2/3 with the prepared cake batter & baked it at 180C for about 30 mins. I then made a simple butter frosting (but half the amounts of sugar - as I found it too sweet, if 4 cups were added in...) and coated the cupcakes with it. Retain the remainder frosting, as you will need it again.

I then topped it with chocolate magic topping (what you would usually use on real ice-cream where the cold from the ice-cream will actually harden the chocolate), or you could make your own using this recipe, which I have yet to try & if anyone does, let me know how good it is... but at least making your own means that there will be minimal preservatives, additives, etc... :-D. Anyway, I digress...

Once topped with chocolate magic topping, using your icing bag, ice more buttercream on top of the chocolate topping (so that it resembles freshly piped whipped cream), sprinkle some 100s & 1000s on top, & top with an orange jaffa chocolate. Hopefully that doesn't sound too complicated! :-)

Packed & ready to go to school... :-)

Some inspirational sources when I was wondering how to do this & looking at pictures online to help...
(c) Totally love the presentation of this one... http://cakecentral.com/gallery/41286

But if you do google & search for "ice-cream cupcakes" you will find tonnes of pictures... Really fun to do! ;-D And the kids will LOVE it... *hehe*

Thanks for reading & enjoy baking... :-D


Share/Bookmark

Monday, June 6, 2011

White Chocolate Chips, Cherries & Cranberries Muffin

After School Snack & Dessert: 6-Jun-2011


So I've bought a huge bag of dried cranberries & a big bag of dried cherries from Costco on my first trip.. (oh & yes, decided join the Costco membership...) & have been wondering what to do with both bags... apart from just chomping them straight... so I decided to browse through google & found this recipe... silly me though forgot to note down the website it came from & as such, I can't remember where it originated from... so sorry about that... I think it might have been a emmm forum of some sort though for the life of me, I can't remember which forum it could be... *sigh*


Ingredients:
2 cups plain flour
2/3 cups raw caster sugar
3 tsp baking powder
1/2 tsp salt
1/4 cup sunflower oil
1 egg - beaten
1 cup low-fat lactose free milk (or any milk you have)
3/4 cup white chocolate chips
1/2 cup dried cranberries
1/2 cup dried cherries
2 cups boiling hot water

Method:
1. Soak dried cranberries & dried cherries in boiling hot water for about 15 mins to plump it back up again. Drain (water will not be used in recipe).
2. Preheat oven to 180C.
3. Mix all dry ingredients together (ie. flour, sugar, baking powder, salt, white chocolate chips).
4. Add in oil, egg & milk. Mix well.
5. Add in drained cranberries & cherries & mix well.
6. Spoon into muffin trays till almost full.
7. Bake at 180C for approx 25 mins till golden & cooked through.
8. Remove & cool on cooling rack.
Share/Bookmark

Saturday, May 21, 2011

Farewell Dinner...

Farewell Dinner: 20-May-2011

I found this cake idea & wanted to try to reproduce it... & here this is the result, my version of it anyway (which is pretty close, I think... don't you... *hehe*)


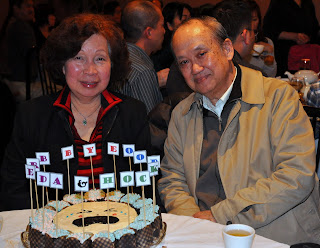
Baked this cake to share with the lovely ladies (& hubbies who came too) of the FGA ladies' group who attended the farewell dinner for Aunty Breda & Uncle Koo...
 
We will miss you both greatly! Come back for visits soon!

 I baked chocolate cupcakes and the Asian cotton soft cheesecake as the cake in the middle. Both the cupcakes and the cheesecake was covered in Vanilla Butter Cream Cheese Frosting that was absolutely yum... (btw, the chocolate version of this frosting placed ontop of the chocolate cupcakes will be the best ever combination!!) 

The farewell dinner was held at Ma Brown Restaurant. Details as follows:

Ma Brown Restaurant
Shop 6, 188-190 Belmore Rd,
Balwyn 3103.

Tel: 9816 3755.


Cutting the cake...

We had a great time there. The company was great & the food was EXCELLENT! It isn't a big restaurant and can get awfully crowded so it would be good to call & make a booking if you wanted to dine there. Just a word of caution, they do try their best but they are rather understaffed so many times you'd need to help yourself to things like tea refills, etc. It is best to book & pre-order your dishes as well as they will take awhile to attend to you when the restaurant gets super busy. Their signature dish is the spicy quails which I've been told you'll have to order at least 3 days in advance but it was totally YUMMY!

The cake was transformed into a
"tears of joy" cake by A. Breda! :-)


FGA Ladies' Group with A. Breda & U. Hock Poo


Here are pictures of what was ordered for that night...
 
Specialty Spicy Quails - we ordered 2 each! Yummy!!
Yummy crispy duck... Mmmm...
(but help yourself to sauce coz we asked for plum sauce
& chillie oil too, both of which never came!)
Braised Pig Trotter with Herbs
Teow Chew Steam Fish
(sauce is slightly sourish because of the sour plums used)
Sambal Long Beans - YUM!
Prawns with special sauce
And, just for the ladies who attended -
GUESS THE NAME OF THIS LAST DISH! 
*hahahahaha*
Red Bean Soup for Dessert...


Share/Bookmark

Tuesday, May 17, 2011

Birthday Soccer Cake

Birthday Celebrations: 15-May-2011


We celebrated little Josh's b'day yesterday with a little surprise birthday party... His mum, Mary was most delighted & happy... Yay! :-D Blessed Birthday little Josh... :-)

 
Yummy Caaakkkkeeee!!!  :-)

 
The most moist delicious chocolate cake
I baked the case (the green field) as a chocolate cake and the soccer ball as an Asian cotton soft cheesecake. Both the base and the ball was covered in Vanilla Butter Cream Cheese Frosting that was absolutely yum... (btw, the chocolate version of this frosting is absolutely the best ever!!) - Part of the frosting was dyed with green & yellow dyes to the right color, then used to cover the base of the cake followed by a healthy sprinkling of rough coconut shavings that had also been dyed with green & yellow dyes.The other part was left as is to cover the "white" part of the ball. The small amount left was dyed with black as dark as I dared go without altering the taste of the frosting resulting in a dark grey instead of a black. If black was absolutely necessary, try using gel or powdered coloring, the colors will be much more intense. The little flower rosettes that made up the soccer ball, giving it color & shape was done using a #5 tip on an icing gun...
The Asian Cotton Soft Cheese Cake
Contrary to belief, I had an absolutely great time decorating this cake! I find it relaxing & fun...  *hehe*  Thanks heaps Anne for providing me with yet another perfect excuse to bake & decorate more cakes... LOL!

Blessed Birthday to you once again Josh... We love you heaps! :-)


Share/Bookmark

Monday, May 16, 2011

Egg and Bacon Pies - Lunchbox Idea!

Lunch Box: 11-May-2011


This is excellent for lunch boxes (& picnics) because they can be eaten cold too! :-) Plus my fussy daughter actually loves it! I'm shocked as she doesn't like eating hard boiled eggs on their own... Hmmm funnily enough though, my normally not fussy son doesn't like this... Odd...

Recipe from: recipes+ mag, May 2011 issue, pg 15.

Yummy... what's on the inside...
To freeze: Wrap, individually, in a double layer of plastic food wrap; freeze for up to 3 months.
Thaw: in fridge overnight.
Reheat pies on a baking tray covered with foil. Bake in an oven preheated to 180C/160C fan forced for 15 - 20 mins or until heated.
DIY idea: Replace bacon with ham, salami or pastrami.

Pies can be eaten cold and are great for picnics and packed lunches.

Makes 8
Preparation: 20 mins
Cooking: 20 mins
2nd batch I made 12 pies!!

Ingredients:
2 sheets frozen shortcrust pastry, thawed
3 bacon rashers, rind removed, finely chopped
2/3 cup grated tasty cheese (I used mozzarella cheese)
8 eggs, at room temp
1 tbsp finely chopped flat-leaf parsley, to serve (optional)

Method:
1. Preheat oven to 200C/180C fan forced. Cut pastry into quarters (squares). Line 8 holes of a 12-hole (1/3 cup) muffin tray with pastry squares.
2. Sprinkle bacon & cheese into pastry cases.
3. Carefully crack 1 egg into each case.
4. Bake for 20 mins or until egg is set & pastry is golden.

Optional extra: Top with more cheese after 10 -15 mins of baking then carry baking till pastry is golden & egg set & cheese on top has melted.

4 Remove from oven. Stand in tray for 5 mins, then carefully transfer to a wire rack to cool.
[If freezing freeze at this point, see tips above]

5. Serve pies sprinkled with parsley.
Share/Bookmark

Chicken Pasta Soup with Mozzarella Toasties

Dinner: 10-May-2011

My MIL has declared this the best ever chicken meatballs... so it has to taste pretty good, even though my daughter declared she didn't like it (I think it was the presence of onions & vegies that she didn't like, really... LOL!)  They were really easy to make & tastes real nice too... without all the added yucky stuff you find in commercial chicken meatballs...

Recipe from: recipes+ mag, May 2011 issue, pg 13

DIY idea:
1. Replace meatballs with sausages. Trim ends from casings & squeeze meatball sized balls into pan.
2. Use spaghetti instead of angel hair pasta.
3. Process 1 slice day-old white bread for crumbs.
4. Halve quantities if you have little freezer space.

Note: If not freezing soup, omit step 3 below.

serves 6
Preparation: 30 mins
Cooking: 15 mins


Meatballs to be cooked
Ingredients:
For Chicken Pasta Soup:
700g chicken mince
1 clove garlic, crushed (or 1 tsp bottled garlic)
1 large brown onion, finely grated (diced finely)
Pinch chilli flakes (optional)
3/4 cup soft fresh breadcrumbs (I used a wholemeal bun & processed it myself)
1/4 cup finely chopped flat-leaf parsley, plus extra to serve
1/3 cup freshly grated parmesan, plus extra to serve
1 tbsp vegetable oil or olive oil
1 litre (4 cups) salt-reduced chicken stock
2 cups frozen vegetable mix
Meatballs cooked! Yum!
100g angel hair pasta, broken into 6cm lengths

Mozzarella Toasties:
12 thick slices white bread (I used Turkish buns cut into half)
1 cup coarsely grated mozzarella cheese

Method:
For Chicken Pasta Soup:
1. Combine mince, garlic, onion, chilli, breadcrumbs, 1/4 cup parsley and 1/3 cup parmesan in a medium bowl. Mix well then shape heaped tablespoons of mixture into 36 balls.
2. Heat oil in a large saucepan over moderately high heat. Add meatballs; cook and turn for 5 mins or until browned.
3. Place stock in a large saucepan. Bring to the boil over moderate heat. Add vegetables. Reduce heat; simmer, uncovered, for 5 mins or until veggies are just tender. (If not freezing, go straight to step 5).
4. [TO FREEZE] Layer rows of meatballs between sheets of baking paper in an airtight container; freeze (for up to 3 mths). To reheat, thaw meatballs and stock mixture in fridge overnight. Place stock mixture in a large saucepan.
Finally all done! Dinner!
5. Bring stock mixture to the boil over moderate heat. Add pasta; gently boil for 5 mins or until pasta is tender. Stir in meatballs; cook for 2 mins or until heated. Season. Remove from heat. Stir in extra parsley.
6. Ladle soup into serving bowls. Sprinkle with extra parmesan. Serve with mozzarella toasties.

For Mozzarella Toasties:
1. Preheat sandwich press (or grill).
2. Sprinkle half the bread with cheese. Top with 1 remaining slice.
3. Cook toasties in batches, in sandwich press for 2 - 3 mins or until mozzarella melts & bread is golden.
Share/Bookmark

Monday, April 25, 2011

Zebra Butter Cake

Afternoon Tea: 25-Apr-2011


Well let's see here... My gf, Adeline posted a status on her FB account with this rainbow cake in mind... and me being me, I just couldn't help myself so I checked it out & so wanted to try it out *hahaha* but thought I should proceed to have a look at a few others for inspiration purposes... and found one from one of my fav bloggers, Not Quite Nigella. Reading her blog led me to her zebra cheesecake which I will do another time using the japanese cheesecake recipe I've found, tried & blogged about... but anyway, so I decided to a zebra version of the butter cake that a friend (Viv Kwan) baked yesterday for our FGA Chinese Church... The straight butter cake she baked tasted very yum & was very cool indeed... hence, the Zebra butter cake inspiration was born - I had all the necessary ingredients *haha*...

Ingredients (serves 12)
  • 250g unsalted butter, softened
  • 1 cup raw caster sugar
  • 2 teaspoons vanilla essence
  • 3 eggs
  • 2 1/2 cups self-raising flour
  • 2/3 cup milk (I used the usual Lactose free, low fat, Liddell's milk)
  • 2 tbsp unsweetened cocoa powder (Homebrand)

  • icing sugar mixture, to serve (optional)

Cake all done... will it look like a zebra?
Method
  1. Preheat oven to 160°C fan-forced. Grease and line bottom of an non-stick 8cm-deep, 19cm - 23cm (base) round cake pan with baking paper.
  2. Using an electric mixer, cream butter, caster sugar and vanilla in a medium bowl on medium-high speed until light and fluffy.
  3. Add eggs, 1 at a time, beating to combine until all eggs mixed in. Add half the flour. Stir to combine. Add half the milk. Stir to combine. Repeat with remaining flour and milk.
  4. Separate the cake mixture into 2 parts. Add the cocoa powder to 1 lot and fold cocoa powder in until well mixed.
  5. Zebra stripes = Success! Yay!! :-D
    Put tbsps of cream cake mixture into center of cake pan. Then add about 3 tbsp of chocolate mixture in the center of the cream mixture. Again, add 3 tbsp of cream mixture into center of choc mixture, etc. Keep doing this till all mixture has been used up. 
It is important that you do not tilt the cake pan. The batter will spread on its own. If it appears a bit thick, cut another baking paper the size of the cake base, then put on top of the batter to press batter down so that it spreads & reaches the sides of the cake pan.

6. Bake for approx 1 hour or until a skewer inserted into the center comes out clean. Stand in pan for 10 minutes. Turn out onto a wire rack to cool. Dust with icing sugar (I omitted this part). Serve.
This cake is rather versatile -
(a) if you want a normal butter cake, do the above but omit the part with the cocoa powder & just pour straight into a cake pan & bake.
(b) Try grating the rind of a lemon or orange & adding it to the batter, followed with a couple of tbsp of lemon juice or orange juice, mix well & bake.

ENJOY!!  My kids & hubby loved it... Hubby said was just right & perfect, I thought maybe perhaps the cake could be sweeter... 


Share/Bookmark