Pages

Monday, April 25, 2011

Zebra Butter Cake

Afternoon Tea: 25-Apr-2011


Well let's see here... My gf, Adeline posted a status on her FB account with this rainbow cake in mind... and me being me, I just couldn't help myself so I checked it out & so wanted to try it out *hahaha* but thought I should proceed to have a look at a few others for inspiration purposes... and found one from one of my fav bloggers, Not Quite Nigella. Reading her blog led me to her zebra cheesecake which I will do another time using the japanese cheesecake recipe I've found, tried & blogged about... but anyway, so I decided to a zebra version of the butter cake that a friend (Viv Kwan) baked yesterday for our FGA Chinese Church... The straight butter cake she baked tasted very yum & was very cool indeed... hence, the Zebra butter cake inspiration was born - I had all the necessary ingredients *haha*...

Ingredients (serves 12)
  • 250g unsalted butter, softened
  • 1 cup raw caster sugar
  • 2 teaspoons vanilla essence
  • 3 eggs
  • 2 1/2 cups self-raising flour
  • 2/3 cup milk (I used the usual Lactose free, low fat, Liddell's milk)
  • 2 tbsp unsweetened cocoa powder (Homebrand)

  • icing sugar mixture, to serve (optional)

Cake all done... will it look like a zebra?
Method
  1. Preheat oven to 160°C fan-forced. Grease and line bottom of an non-stick 8cm-deep, 19cm - 23cm (base) round cake pan with baking paper.
  2. Using an electric mixer, cream butter, caster sugar and vanilla in a medium bowl on medium-high speed until light and fluffy.
  3. Add eggs, 1 at a time, beating to combine until all eggs mixed in. Add half the flour. Stir to combine. Add half the milk. Stir to combine. Repeat with remaining flour and milk.
  4. Separate the cake mixture into 2 parts. Add the cocoa powder to 1 lot and fold cocoa powder in until well mixed.
  5. Zebra stripes = Success! Yay!! :-D
    Put tbsps of cream cake mixture into center of cake pan. Then add about 3 tbsp of chocolate mixture in the center of the cream mixture. Again, add 3 tbsp of cream mixture into center of choc mixture, etc. Keep doing this till all mixture has been used up. 
It is important that you do not tilt the cake pan. The batter will spread on its own. If it appears a bit thick, cut another baking paper the size of the cake base, then put on top of the batter to press batter down so that it spreads & reaches the sides of the cake pan.

6. Bake for approx 1 hour or until a skewer inserted into the center comes out clean. Stand in pan for 10 minutes. Turn out onto a wire rack to cool. Dust with icing sugar (I omitted this part). Serve.
This cake is rather versatile -
(a) if you want a normal butter cake, do the above but omit the part with the cocoa powder & just pour straight into a cake pan & bake.
(b) Try grating the rind of a lemon or orange & adding it to the batter, followed with a couple of tbsp of lemon juice or orange juice, mix well & bake.

ENJOY!!  My kids & hubby loved it... Hubby said was just right & perfect, I thought maybe perhaps the cake could be sweeter... 


Share/Bookmark

Friday, April 15, 2011

Homemade Fish Balls & Yong Tau Foo

Dinner: 15-Apr-2011


Finally successful with those fish balls... The first time I made these fish balls, I used my Barmix (stick blender) to blend the fish meat. However, I think I ended up "spoiling" the fish meat & when the fish balls were formed, they were not bouncy and ended up disintegrating when soaking in the salt water. Determined not to let that 1st bad experience damper my enthusiasm for home made fish balls, I went & bought Pike as recommended by my MIL... This time, I used the back of the knife to pound at the fish & then made those fish balls. They were a great success... Yay!!  The pictures you see here are from my 3rd time making these fish balls but using the Spanish Mackeral fish instead... THE BEST!!! Yummy...  :-) Totally ecstatic with the success of it... there was so much meat I made yong tau foo as well... sooo yummy!  :-)

Recipe adapted from: Rose's Kitchen Blog

Ingredients:
800g Spanish Mackeral (scraped flesh only), I have also used Pike & its pretty good but not as meaty compared to Spanish Mackeral & with longer strands that can get tangled within the fish meat...


Fish paste after Method 6
Solution A: 2 tbsp water + 1/2 tsp salt

Solution B:
100ml water
1/2 tsp sea salt
a dash of pepper
1 tbsp cornflour

Method:
1. Clean fish, wipe dry and fillet with a sharp knife (I got the fish monger to fillet fish for me when I bought it).
Method 8. Forming fish balls
2. Scrape fish flesh from skin and bones using a soup spoon. Note, scrape in direction of "grain" from center point moving outwards.
3. Place fish flesh on a wooden chopping board.
4. Pound the flesh of the fish with the back edge (not sharp edge) of chopper knife until very fine & starting to stick together, adding the salt solution A a little at a time.
5. Place the fish paste in a big bowl, stir in 1 direction until very sticky, adding solution B whilst stirring. You can add some chopped up spring onions, Chinese sausage, etc at this stage to add to the flavour of the fish ball.
6. Take handfuls of the fish paste & throw or slap it against the sides of the bowl till the paste becomes springy.
7. Grease hands & fingers with a little oil (I omitted this step & it was fine, just a little stickier, I guess).
Fish Balls soaking!
8. Take a lump of fish paste and gently squeeze paste out between thumb and index finger to form small balls.
9. Scoop out the balls of fish paste with a spoon and drop them into a bowl of water salted with 1/2 tsp salt.
10.Leave the fish balls to soak in salt water for at least 1/2 hr. (Note: If fish balls done correctly, it will not disintegrate in water! I have first hand experience in this as my 1st go was a total flop... LOL!).

Yong Tau Foo anyone?


11. After fish balls have soaked in the water for 1/2 hr, boil some water & cook them, then enjoy with a bowl of noodles, stuff them into vegies to make yong tau foo or just on its own! :-)

YUMMY!!!! And so much more nutrition for you and the kiddies compared to the store bought frozen ones...
Share/Bookmark

Thursday, April 14, 2011

Chocolate and Orange Hot Cross Buns

Breakfast: 13-Apr-2011

Wanted to bake something today but just didn't know what... so off I went searching on the internet then I remembered during our chat last night after Boot Camp exercise that  somehow hot cross buns came into the conversation and no, I had never made any before... hence resulting in some direction for my internet search... and my inspiration for tonight's baking for tomorrow's breakfast... LOL! My kids don't seem to like sultanas very much, so I searched for chocolate hot cross buns and found one with orange... Yummy...  :-)


Blessed Easter Everyone! :-) Please stay safe on our roads this holidays yah... 


Recipe was adapted from 2 separate websites:
(a) http://www.timesonline.co.uk/tol/life_and_style/food_and_drink/recipes/article5982542.ece
(b) http://womansday.ninemsn.com.au/food/everydayrecipes/994527/mini-choc-chip-hot-cross-buns


Ingredients:

Before Proving
For Hot Cross Buns:
500g White Wings plain flour
2 tsp dried yeast
1 tsp salt
1 tsp mixed spice
100g chocolate chips (preferable dark, but milk is OK too)
50g sultanas (I didn't have this on hand, so I just substituted with more choc chips)
Zest of 2 navel oranges, finely grated (I used my zester to zest orange then used a pair of scissors to cut finer)


2 tbsp honey
1 egg (lightly beaten)
200ml warm water (I put freshly squeezed orange juice instead for a stronger orange flavor & it was divine)
After Proving
100ml warm milk (I used low-fat lactose free milk)
25g melted butter


Paste for crosses, I think... *hehe*
For Crosses:
2 tbsp plain flour
1 tbsp cocoa powder
2-2.5 tbsp water


For Glaze:
1/4 cup water
2 tbsp raw caster sugar


Method:
1. Sieve the flour into a large mixing bowl.
Before Crosses added
2. Stir in the yeast, salt, mixed spice, sultanas, orange zest & chocolate.
3. Heat up the milk, add honey to it & stir till honey dissolved in hot milk then allow to cool to a warm temperature.
4. Mix slightly warmed orange juice to milk mixture.
5. Mix egg & melted butter to the cooled milk & juice mixture.
6. Pour liquid into flour mixture then mix until it comes together into a loose dough. I used a spoon to help me do this initially, then when it came together, I used my hand to further mix it through.
7. Knead for 5 minutes until a hand indentation pressed into the surface springs back straight away.
8. Cover & leave in a warm place for about an hour or so until it has doubled in size. Preheat oven to 200Celsius.
9. When doubled in size, lightly knead again to get rid of the air. Roll out into a sausage & cut off approx 10 portions. Roll these into balls & place onto a greased & floured baking tray. Cover again & leave for 20-30 mins until they double in size again.
Enjoy spread with butter!
10. Crosses: In a small bowl, mix flour, cocoa & water to create a smooth paste. Pipe crosses on buns. 
11. Bake for 15 - 20 mins until golden brown & they sound hollow when tapped. Remove from oven.
12. Glaze: In a small saucepan, combine water & sugar. Stir over low heat for 2 - 3 mins until sugar dissolves. Bring to boil, without stirring. Reduce heat & simmer 1 - 2 mins, until mixture thickens slightly. Brush over hot cross buns.
13. Transfer to wire rack to cool.


Spread some butter on it & ENJOY especially (if possible) fresh out of the oven... Mmmm... yummy...  :-) The orange citrus smell is divine... smells so so good... :-)


Share/Bookmark

Wednesday, April 13, 2011

Baked 5-Spice Chicken

Dinner: 8-Sep-2010, 13-Apr-2011


Our dinner tonight... Yummy!! OK... I've done this recipe tonnes of times, & so decided to migrate it over from FB to my blog here instead... easier to access...  :-)  It really is yum... Will probably make it today too & see if I can take more photos as well - stay tuned for an update of photos (recipe is fine as is)... My kids love calling this "Mummy's KFC Chicken"... *haha* hopefully a bit healthier than the real KFC chicken... :-)

Recipe from Super Food Ideas, September 2010 Issue, page 28, "Five Spice chicken and fried rice".

Ingredients:
16 pieces of small chicken drumsticks (skin on)
1/2 cup cornflour
1 tbsp Chinese 5-spice powder
1 tsp white pepper (Maybe put 1/2 tsp white pepper instead as my kids found it a bit peppery hot)
2 tsp sea salt
2 tbsp lemon juice (optional)

Method:
1. Preheat oven to 220Celsius/200Celsius (fan forced).
2. Place a wire rack over a large baking tray. (I used a table top convection oven/turbo boiler at about 170Celsius.)
3. Using a sharp knife, cut slits in chicken (I didn't do this part).
4. Combine cornflour, 5-spice powder, pepper & salt into a large snap-lock bag & mix well.
5. Brush chicken with lemon juice. (I omitted this part as my family didn't like the lemon juice in a diff recipe).
6. Spray lightly with oil.
7. Place chicken 1 at a time in a snap-lock bag & seal bag. Toss to coat chicken & place chicken on wire-rack.
8. Bake for 15 mins. 
9. Spray chicken lightly with oil, turn chicken & spray other side lightly with oil.
10. Continue cooking for another 15 mins or until golden & crisp and cooked through.


Share/Bookmark

Tuesday, April 12, 2011

Mocha Mud Cake

Morning Tea: 11-Apr-2011


Thanks HEAPS Lena for sharing this recipe with me & for allowing me to share it with the world...  :-)  The cake was absolutely yummy...  :-) Not sure why my baking time is soooo long though compared to yours... but anyhow, still tasted absolutely yummy!  I think I should go buy a tub of vanilla ice-cream, reheat the cake & serve it with a scoop if ice-cream... Ooooooo yummy...  Will post a pic if I can get myself out of the house on this funny rainy day! *haha*  The children seem to really love it!  :-) Don't worry mummies, I used decaf coffee powder. ;-)

Ingredients:
3 eggs - lightly beaten
Lined bottom of non-stick tin
7 fluid oz evaporated or fresh milk (I used Liddel's Lactose Free, Low Fat milk)
7 fluid oz water
7 fluid oz oil (I used sunflower oil)

13 oz raw caster sugar
3 oz cocoa powder
1.5 tsp decaf nescafe powder (I put 3 - 4 tsp for a stronger coffee taste)
6 3/4 oz plain flour
2 tsp soda bicarb

(Note: I replaced plain flour & soda bicarb for just 6 3/4 oz White Wings Self-raising flour instead.)

Method:
1. Preheat oven to about 150Celsius.
2. Line the base of a non-stick 23cm cake tin with baking paper.
2. In a large bowl, hand mix with a large mixing/serving spoon, all dry ingredients together.
3. Using the same spoon, mix all liquid ingredients together.
4. Slowly pour liquid ingredients into the dry ingredients a little at a time, mixing it well with the same spoon. Don't be shocked, when all liquid ingredients have been mixed with dry ingredients, the end result is quite watery.
5. Pour into cake tin. Turn oven up to 180Celsius. Put cake tin straight into oven (my mum reckons this is the way to prevent the top of the cake from cracking, it seems to have worked!).
6. Bake at 180Celsius for 45 mins until center is cooked - test with a skewer. If skewer poked in center comes out clean, cake is cooked, if still sticky in the center, increase baking time by 10 min increments until center of cake is cooked throughly (I had to bake mine for about 1.5 hrs - I guess different ovens bake differently?).
7. Use a spatula to release sides of cake from tin then invert onto a rack & remove paper from cake. Cool.
8. When completely cooled, dust cake with icing sugar for a nice finish.

Serving suggestion:
Serve cake as is, or warm cake slightly in microwave for about 5 - 10 secs on high, serve with a dollop of whipped cream or a scoop of vanilla ice-cream.
Share/Bookmark

Saturday, April 9, 2011

Orange Poppy Seed Chiffon Cake

Date: 9-Apr-2011


A lot of this recipe has been taken from the Pandan Chiffon cake recipe as I used the same recipe to do this cake, so don't mind, but you will find similar wordings.

The Orange Poppy Seed Chiffon cake tasted yummy - It really is nice & soft with that touch of crunch from the poppy seeds... Mmmmm...... Great with a nice hot cuppa!

Ingredients


Zesters are the best things!
In 2 separate bowls:

Bowl A:


6 x egg yolks
2oz (liquid oz) corn or canola oil (I used olive oil)
2.5oz raw caster sugar
5oz self-raising flour
2oz (liquid oz) freshly squeezed orange juice
zest of 1 orange
1/4 cup poppy seeds
White, Stiff & Glossy!
Note: I used Navel Oranges for juice & zest.


Bowl B (cake beater bowl):

Important note: make sure this bowl has absolutely NO GREASE on it... wash it in super hot soapy water if necessary!!

6 x egg whites
2.5oz caster sugar
1/2 tsp salt
1/2 tsp cream of tartar

Method

1. I have bought some nice new heavy duty non-stick cake tins & do not need to oil/grease them.   (alternative: use normal cake tin but line with baking paper - paper must rise higher than cake tin, as this cake will rise high or use a deep non-stick cake tin but just line the base to make it easier to remove cake from tin).


Egg Yolk Mixture - well mixed!
2. Mix all ingredients in Bowl A (egg yolk mixture) using a spoon or fork. Make sure it has been mixed well! Then set aside.


3. Using a cake beater, whisk ingredients in Bowl B (egg white mixture) until white, stiff & glossy. Do a test: put bowl of beaten egg white upside down, if correct consistency, nothing moves, egg white remains in bowl. If as you're putting bowl upside down, egg white moves, it has not been beaten enough.

4. Take 2-3 spoonfuls of egg white & mix into the egg yolk mixture to thin the egg yolk mixture slightly.

5. SLOWLY fold egg yolk mixture INTO egg white mixture.
6. Pour mixture into Chiffon Cake Tin & smooth top of cake.
7. Bake at 150Celsius for 1 hr or till skewer comes out clean.


8. Cool cake in tin upside down until completely cool before removing from tin. 

Alternatives:

Instead of 2oz = orange juice, zest of an orange & poppy seeds, try:
(a) Pandan Chiffon Cake
Enjoy!
(b) 2oz = Lemon Rind, a few squeezes of lemon juice & make up the rest of the weight with milk (separately otherwise milk may curdle) - then pour separately into egg yolk mixture.
(c) Add 25g black sesame seed powder to a liquid measuring cup, then pour & mix in low fat soy milk up to the 2oz level.


Share/Bookmark

Birthday Golf Cake

Birthday Cake: 2-Apr-2011


Decorated this cake for a friend & I thought I'd show some pics of it...  Inspiration for the decoration came from this parenting website.

My mum baked the massive chocolate walnut liquor cake... :-) 

I used:
(a) rough dried shredded coconut (not the fine one & not the fresh one either) - for grass dyed green using green & a bit of yellow food colouring
(b) egg roll biscuits (from the Asian Grocery Shop) -  crushed up for sand
(c) red coloured Strapz - for the flag
(d) small skewer - for the flag pole
(e) 1 large chocolate melts - for the hole
(f) 3 Lindt golf balls (bought from SweetAs)
(g) Strawberry Frosting (which my mum said was the wrong frosting to use... Ooopsss) - dyed bluish for water - pictured doesn't look too blue & it wasn't, I think I had to put more blue into it next time, oh well! & green for the grass green where the flag pole is.


Share/Bookmark

Friday, April 1, 2011

Birthday Purse Cake

Date: 31-Mar-2011

Blessed Birthday Mum!!  :-D We celebrated mum's birthday at Formosa House Chinese Restaurant (Add: 86 Springvale Rd, Nunawading). Food there was excellent especially that fish that was recommended to us... yum yum!! My hubby has helped me to label the types of food we ordered! LOL!

OK not sure what's happening with the arrangement of the photos here... but here they are anyway...

Canton Pork Ribs
Crispy Chicken


Sizzling Mongolian Lamb


Spicy Salt Deep Fried Fish
Yummy food!!


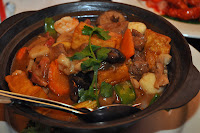
Combination Tofu Hot Pot
Baked the usual Japanese Strawberry Shortcake then covered it with the same frosting I used for the Birthday robot cake.

The idea was inspired by this website: http://www.parenting.com/article/how-to-make-a-purse-cake.

Ooopsss! Candles burnt the handles!
I used:
(a) for handles: long twisted marshmallows - cut into 2 long pieces (you can buy them at the sweet section of BigW in ForestHill, VIC. It took a ridiculously long time just to find the long marshmallows... one of those where you remember seeing them somewhere but can't quite remember which shop it was, so you end up visiting many shops to find it & finally find it in the very last shop...).
(b) for flower petals: normal white marshmallows - cut into 3
(c) for center of each flower: Malteesers
(d) for leaves: Spearmint leaves - cut into 2 (can be found in Target)
(e) for buttons on side of bag - brown M&Ms

Cake anyone?

I sprinkled pink 100s & 1000s at bottom just for added fun... & made a colorful border on the cake plate, using the left-over M&Ms.

Note: Do not put candles near the handles, as you can see, those marshmallow handles burn easily!

Share/Bookmark